Checkout Page
The Monnify Checkout Page is a pre-built payment UI that opens as a modal on your website or inside your mobile app. It handles all payment methods (bank transfer, card, USSD, and phone number) so your customers can pay without leaving your platform.
Monnify Web Checkout
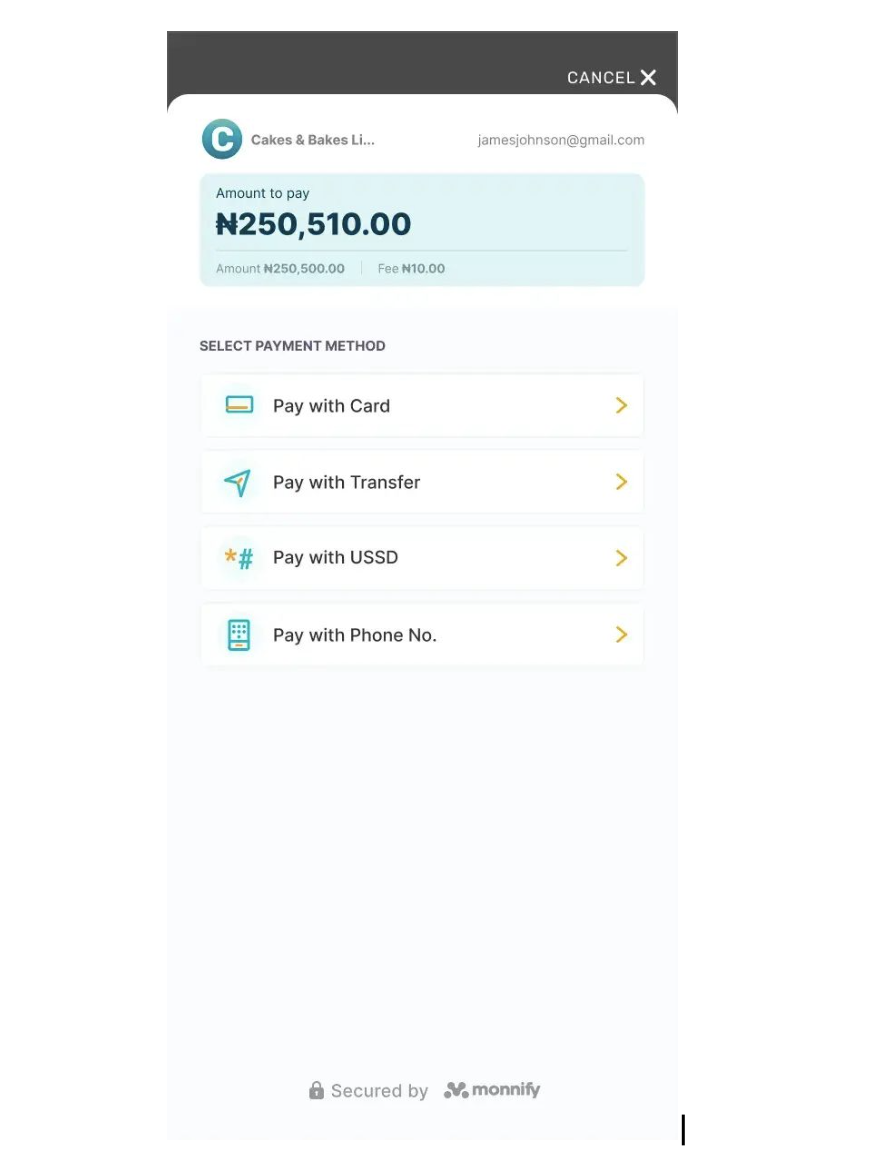
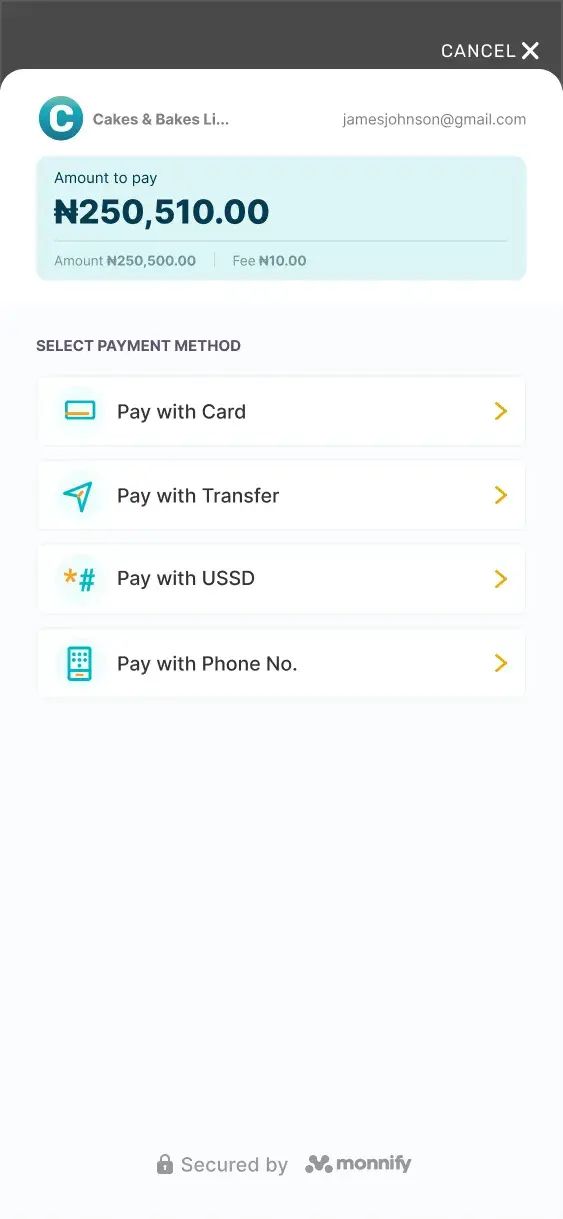
Add the Monnify JS SDK to your website to open the checkout modal. Customers can pay via:
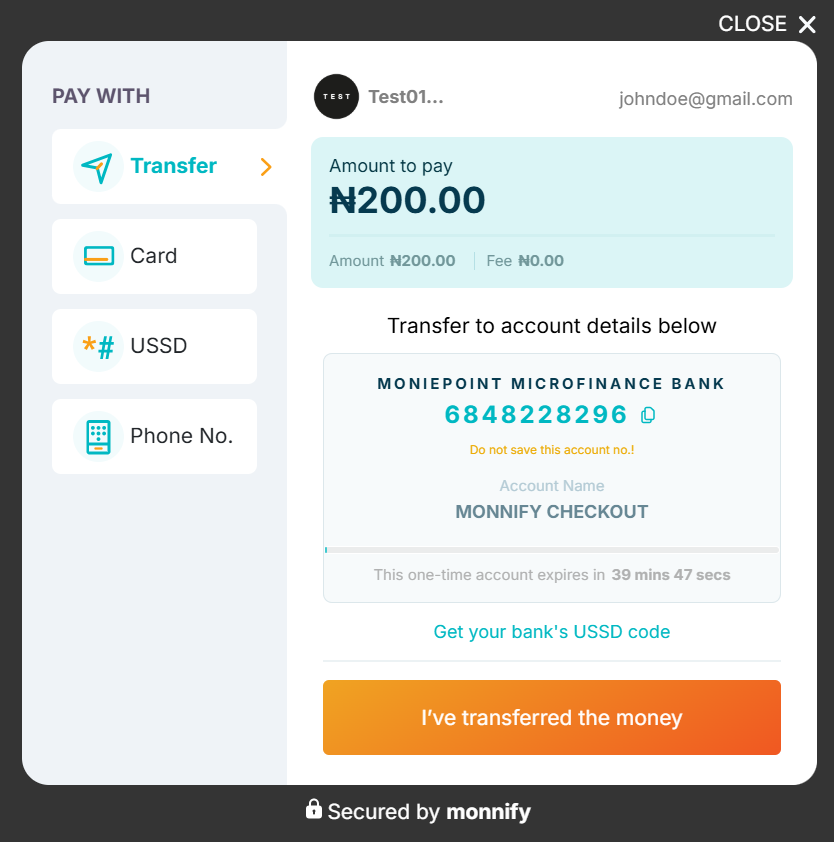
- Pay with Bank Transfer: A dynamically generated account number is displayed for the transaction. The customer transfers the exact amount from any bank app.
- Pay with USSD: A bank-specific USSD code is generated. The customer dials it to authorize the payment with no internet connection required.
- Pay with Card: The customer enters their debit card details directly in the Monnify modal.
- Pay with Phone Number: The customer enters their phone number to initiate a payment session from their mobile wallet.
Adding Monnify Checkout to your Website
Add the Monnify JS snippet to your page and call MonnifySDK.initialize() when the customer is ready to pay:
Option A – Script tag (no bundler)
Drop the Monnify script into your HTML and call MonnifySDK.initialize() directly. No installation needed.
Option B – npm Package (React, Vue, Angular)
If you're using a framework with a bundler, install the package that matches your project:
Both packages expose the same class-based API. Instantiate with your credentials and call initializePayment(). Here's a React example:
The same pattern works in Vue and Angular. Instantiate Monnify and call initializePayment() inside your component's pay handler.

The currency field defaults to NGN. Merchants enabled for USD collection can pass USD to accept card payments in US Dollars. You can request access to International Payment from Settings > Contract Setup on your Monnify Dashboard.
Response Object
When the transaction is completed, Monnify will return a response object to your onComplete function.
Always verify the transaction server-side using the Verify Transactions API before fulfilling an order. Monnify will also notify you via webhook for every completed transaction.
User Cancelled Response
If the customer closes the modal, Monnify returns the following to your onClose function:
Controlling which payment methods appear: By default all methods are shown. Pass a paymentMethods array to restrict them:
Monnify Android SDK
Accept payments inside your Android app via card, bank transfer, USSD, and phone number.
- Card Payment
- Bank Transfer
- USSD Payment
- Payment by Phone Number
Steps to Implementation
1. Add the dependency for the Monnify SDKTo your root build.gradle file add:
To your app-level build.gradle file add:
2. Create an instance of the Monnify SDK
Monnify Flutter SDK
Accept payments inside your Flutter app via card, bank transfer, USSD, and phone number.
- Card Payment
- Bank Transfer
- USSD Payment
- Payment by Phone Number
Steps to Implementation
1. Add the dependency for the Monnify SDKAdd monnify_payment_sdk as a dependency in your pubspec.yaml file.
2. Initialize the plugin
Initialize once, preferably in the initState of your widget.
3. Initialize payment
Create a Transaction object and pass it to initializePayment.
Monnify iOS SDK
Accept payments inside your iOS app via card, bank transfer, USSD, and phone number.
- Card Payment
- Bank Transfer
- USSD Payment
- Payment by Phone Number
Steps to Implementation
- Add the SDK via CocoaPods. Add the following line to your Podfile:
- Access the shared SDK instance.
Set your API key and contract code in
AppDelegate.swift. Do this once at app startup. Switch toApplicationMode.livefor production builds.- Specify the transaction parameters:
- Launch the payment modal when the customer taps Pay.
WordPress / WooCommerce Plugin
Sell on a WordPress store? Install the official Monnify WooCommerce plugin and your customers can pay via card and bank transfer directly at checkout no custom code required.
Option C – WordPress / WooCommerce
Step 1 – Install the Plugin
- In your WordPress admin, go to Plugins > Add New.
- Search for Monnify and click Install Now on the Monnify Official plugin.
- Click Activate once installation completes.
Alternatively, download the ZIP from the WordPress Plugin Directory and upload it via Plugins > Add New > Upload Plugin.
Step 2 – Configure Your API Keys
- Go to WooCommerce > Settings > Payments.
- Find Monnify in the list and click Manage.
- Enter your API Key, Secret Key, and Contract Code from the Monnify dashboard.
- Set the environment to Sandbox for testing or Live for production.
- Click Save changes.
Log in to your Monnify dashboard, navigate to Settings > API Keys & Webhooks. Your Contract Code is under Settings > Contracts.
Step 3 – Test in Sandbox
With the environment set to Sandbox, place a test order on your WooCommerce store and complete the payment using a test card or bank transfer. Confirm that the WooCommerce order status updates to Processing before going live.
Step 4 – Go Live
Switch the plugin environment to Live, replace your sandbox keys with your live API Key, Secret Key, and Contract Code, then save. Your store is now accepting real payments.
To keep WooCommerce order statuses in sync automatically, add your webhook URL in the Monnify dashboard under Settings > API Keys & Webhooks. Your WooCommerce webhook URL is: https://yourstore.com/?wc-api=monnify_webhook
Rate this page
How helpful is the content on this page?

Got Questions

Monnify Tutorial Videos


